crafts · April 5, 2026
Paper Graduation Gown Gift Box | DIY Paper Craft for Cricut vs Silhouette | Money & Gift Card Holder
Craft a beautiful paper graduation gown gift box for cash, gift cards, or small gifts! Perfect for Cricut vs Silhouette users. Personalize and create a cherished keepsake.
Paper Graduation Gown Gift Box | DIY Paper Craft for Cricut vs Silhouette | Money & Gift Card Holder
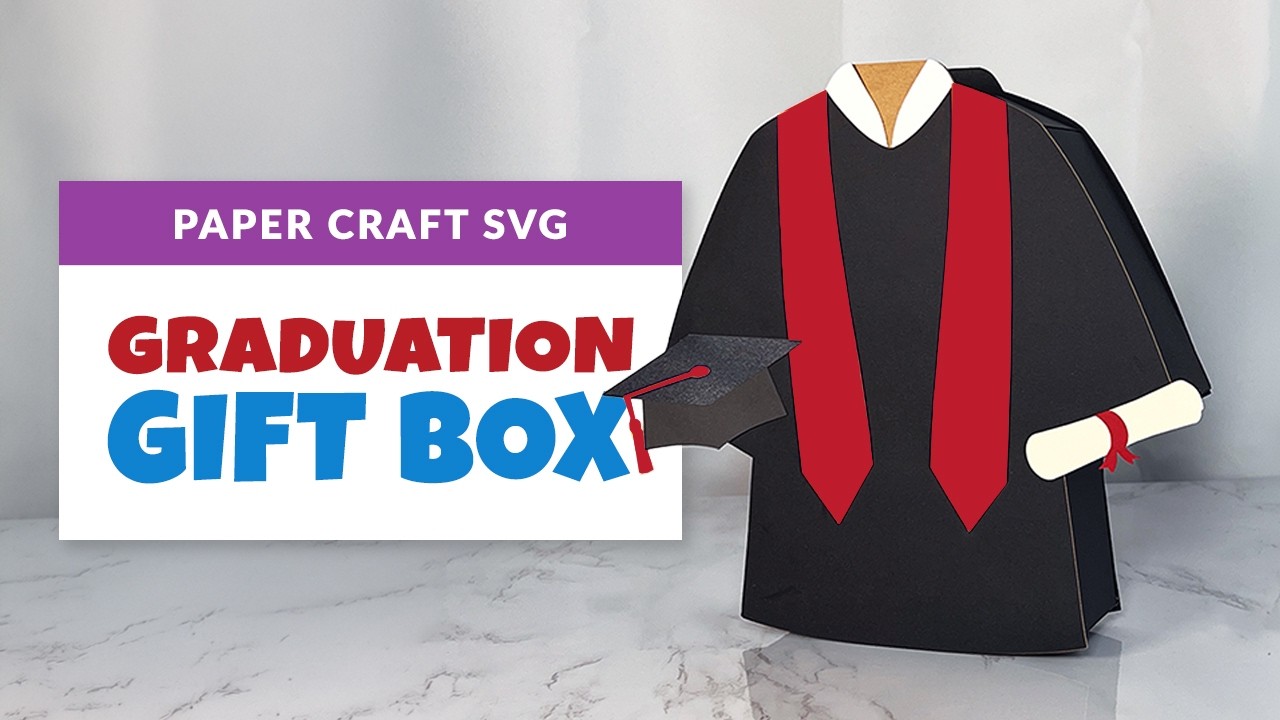
Graduation season is a time for celebration, joy, and, of course, thoughtful gifts! If you’re looking for a unique and personal way to present cash, gift cards, or a small surprise, you’ve come to the right place. This adorable paper graduation gown gift box is not just a gift holder; it’s a keepsake that can be customized to make any graduate feel extra special.
Designed specifically for paper cutting machines like Cricut vs Silhouette, this DIY project is fun, rewarding, and creates a truly memorable present. Let’s dive in and craft something wonderful!
Why Craft a Paper Graduation Gift Box?
Forget the generic envelope! This paper gown gift box offers so much more:
- Personal Touch: Easily customize colors, add names, and graduation years to match school colors or the graduate’s personality.
- Versatile Gifting: Perfect for cash, gift cards, small jewelry, or any tiny treasure.
- Beautiful Keepsake: Once the gift is retrieved, the box itself becomes a lovely decorative item or a cherished reminder of their big day.
- Engaging DIY: Enjoy the creative process of bringing this charming design to life with your cutting machine.
What You’ll Need for Your DIY Graduation Box
Gathering your materials is the first step to crafting success. Here’s what you’ll need:
- Paper Cutting Machine: Your trusty Cricut, Silhouette, or similar machine will do the heavy lifting.
- Cardstock: I recommend 65 lb cardstock for a sturdy finish, but you can go up to 110 lb. Avoid anything thinner, as it might make your box flimsy.
- Paper Glue: A good quality paper glue is essential for clean adhesion.
- SVG Template: You’ll need the easy-to-use SVG template from Nova Makers Mart. This file contains all the pre-designed layers for your cutting machine.
Pro Tip: If you’re new to uploading SVG files or have any cutting process questions, don’t hesitate to reach out or check the instruction page for additional resources.
Let’s Get Crafting: Step-by-Step Assembly
Once your SVG file is uploaded and all your layers are cut out, it’s time for the fun part – assembly!
1. Preparing the Diploma & Cap Details
We’ll start with the smaller, intricate details that truly bring this gown to life.
- Diploma Ribbon: Glue the small ribbon piece onto the diploma layer. This adds an authentic touch!
- Graduation Cap: If you’re using different shades of cardstock (like various dark grays for contrast), start by gluing the top piece of the cap down. This creates depth and dimension.
2. Building the Box Walls: Base & Lid Distinction
This project includes two sets of wall layers – one for the base and one for the lid. It’s crucial to distinguish them during assembly.
- Labeling System: Each wall piece is labeled one through four.
- Lid Pieces: Look for small horizontal lines near the top of the tabs.
- Base Pieces: Look for vertical lines near the bottom of the tabs.
- Gown Layers: The gown layers are marked similarly:
- Lid Gown: Horizontal lines at the top.
- Base Gown: Vertical lines near the bottom.
Important: Before you start gluing, fold along all of the score lines on every piece. This makes assembly much smoother!
3. Assembling the Base of the Box
Let’s construct the foundation of your gift box.
- Identify Base Pieces: Grab the wall pieces with the vertical lines along with the gown layer that has a single vertical mark.
- First Tab: Start with the wall tab marked with one line. Add glue to this tab.
- Attach to Gown: Carefully attach it to the gown layer along the bottom edge.
- Continue with Walls: Add glue to the next tab, then grab the wall layer marked number two and attach it in place. Continue this process, gluing down the remaining tabs and repeating with the rest of the wall layers until the final piece is added and the base walls are complete.
- Clean Finish (Base): Flip the assembled base over. Add glue along the back, then attach the solid black gown layer. This covers all the tabs, giving your box a wonderfully clean and professional finish.
4. Assembling the Lid of the Box
Now, we’ll repeat a similar process for the lid.
- Identify Lid Pieces: Start with the wall layer marked number one, ensuring it has the horizontal lines.
- Assemble Like the Base: Assemble the lid exactly as you did the base, attaching the numbered wall pieces to the lid gown layer.
- Clean Finish (Lid): Once the lid walls are in place, flip the piece over and add glue along the back. This time, attach the tan layer to cover the tabs and give the lid a beautiful, clean finish.
5. Adding the Fun Details
With the base and lid assembled, it’s time to bring the gown to life with all its charming details!
- Collar: Take the two small layers for the shirt collar. I love a classic white, but feel free to choose a color that matches your graduate’s style. Glue them into place, peeking out from the gown.
- Sashes: Add the sashes by gluing one on either side of the collar.
- Diploma Placement: Grab your diploma (with its little ribbon!) and glue it into its designated spot on the front of the gown.
- Cap Attachment: Add a small dab of glue on the other side of the diploma’s top edge to hold the graduation cap in place.
- Final Attachment: Turn this entire detailed front piece over and add glue along the back. Carefully attach it to the tan layer of the lid.
And just like that, your beautiful paper graduation gift box is complete!
Sizing and Scaling Your Gift Box
The project comes with two preset sizes:
- Large Box: Approximately 8 inches tall.
- Small Box: Approximately 5 inches tall.
You can also scale it up or down to fit your specific project needs! Just remember to select all the layers and scale them proportionally within your Cricut or Silhouette software to ensure everything fits perfectly at any size.
Thank you so much for joining this crafting journey! This paper graduation gown gift box is a heartfelt way to celebrate a special milestone. Be sure to like and subscribe for more creative DIY projects from Nova Makers Mart – there are plenty more projects coming your way! Happy crafting!